Sunday 28 April 2013

Farideh Wraps: Review


My sister and I have had the privilege of trying out our friend Megan's custom wrap by Farideh over the past few weeks. With new weavers or companies it  is alway a plus to get other peoples' opinions on the wrapping qualities of a wrap, so you know what you are getting into before you take the plunge and purchase.

With this wrap there are a few special circumstances. This wrap is handwoven, so in turn that means it isn't a readily available wrap that you can just purchase. As of now the custom list is closed, but they will come up again and there are, what they call "sister wraps" that come available. A "sister" is a wrap from the warp of another person's custom. These are handled through a few people so availability isn't open to the general public at the moment. So if you are afraid of reading this, falling in love and wanting one, you might want to stop now; or if you are like me and want to know what you are missing read on. 


Jamie's Review:

First off I want to talk about the mechanics of the wrap. Farideh has used a plain weave for this 4.5 m long 27 inch wide custom, she has used other weaving techniques in other wraps but this one is pretty straightforward. She has used all cotton for this one, but again there is a wide variety of fibres available to you, in this particular wrap she uses 8/2 cotton. She has used Maurice Brassard thread, and if you want to check out all the options of colours/fibres and really geek out, here you go:


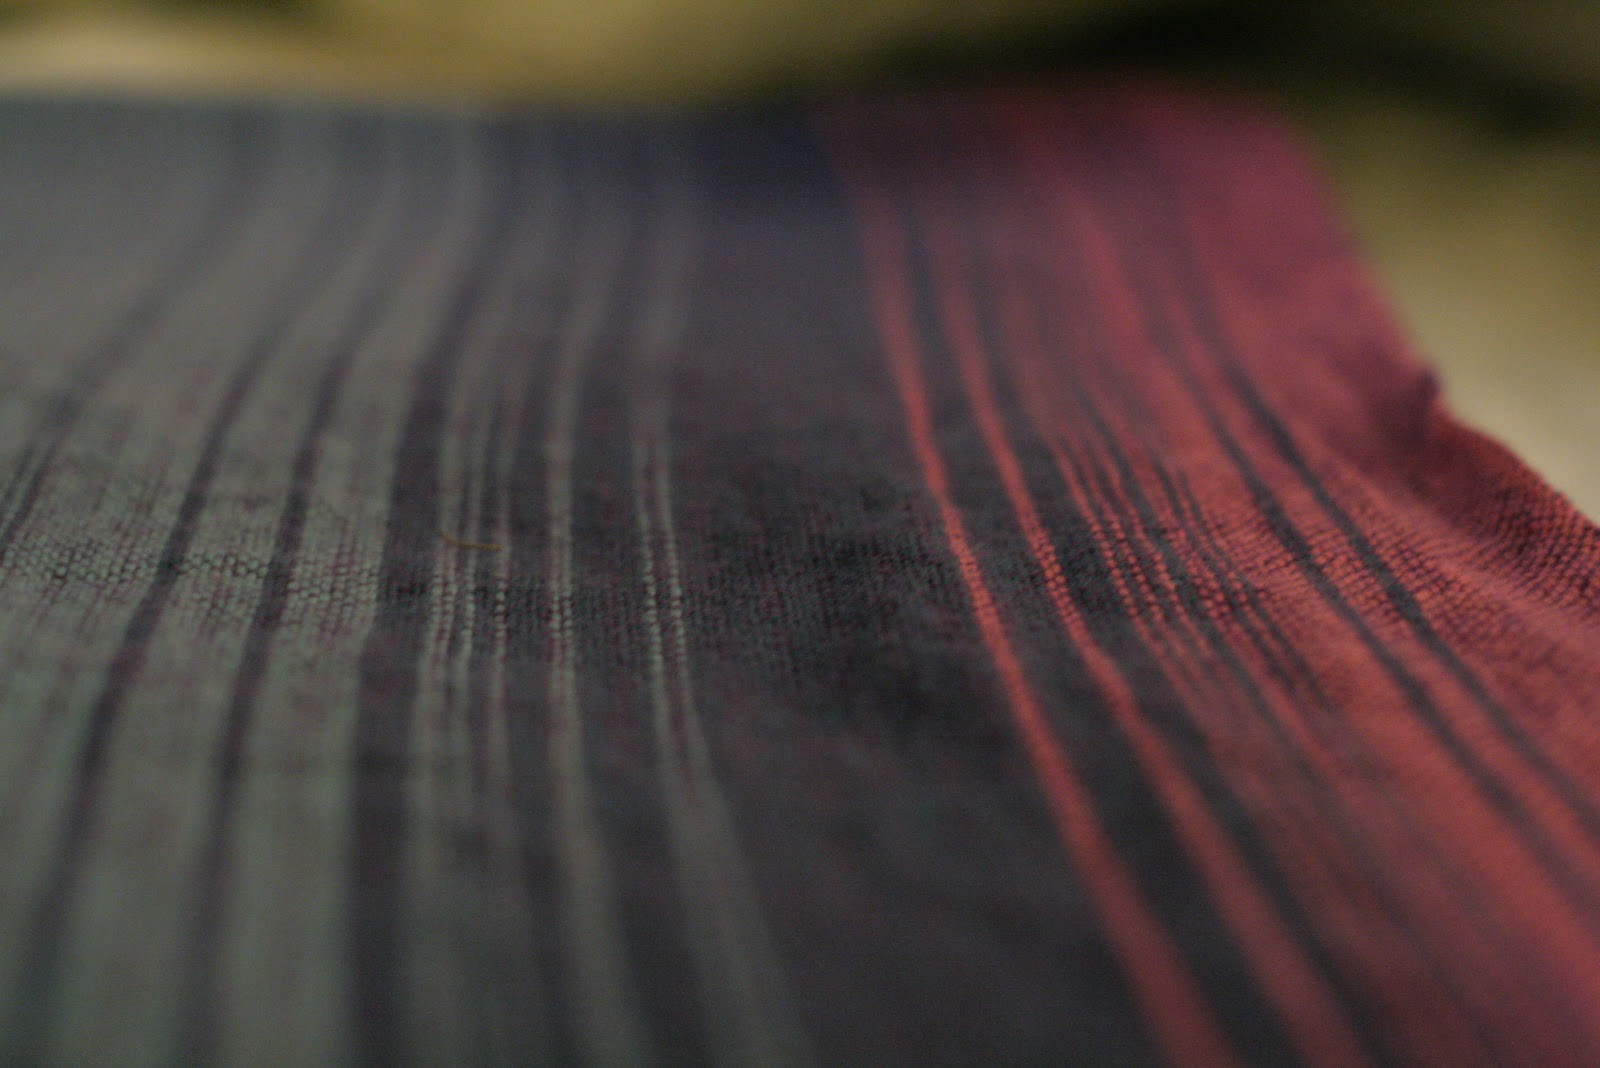
As for beauty the photos really show what words can't describe, it is stunning. The colour gradation flows smoothly throughout the wrap and the choices Megan made I find super appealing. I must note a few things with the weaving that took me by surprise though. There are a few skipped threads throughout the wrap.


These photos also give an awesome detail of the weave
And the raw selvage edges are less than perfect. I must note that this may be because this is Farideh's very first custom and having impeccable edges may come with time. 
This shows the airiness of the weave really well too


also would like to stress that these are all cosmetic things, and in no way affect the integrity of the wrap in any way. Also just spoke with Megan and from her conversations with Farideh the selvage issue is being address now. 


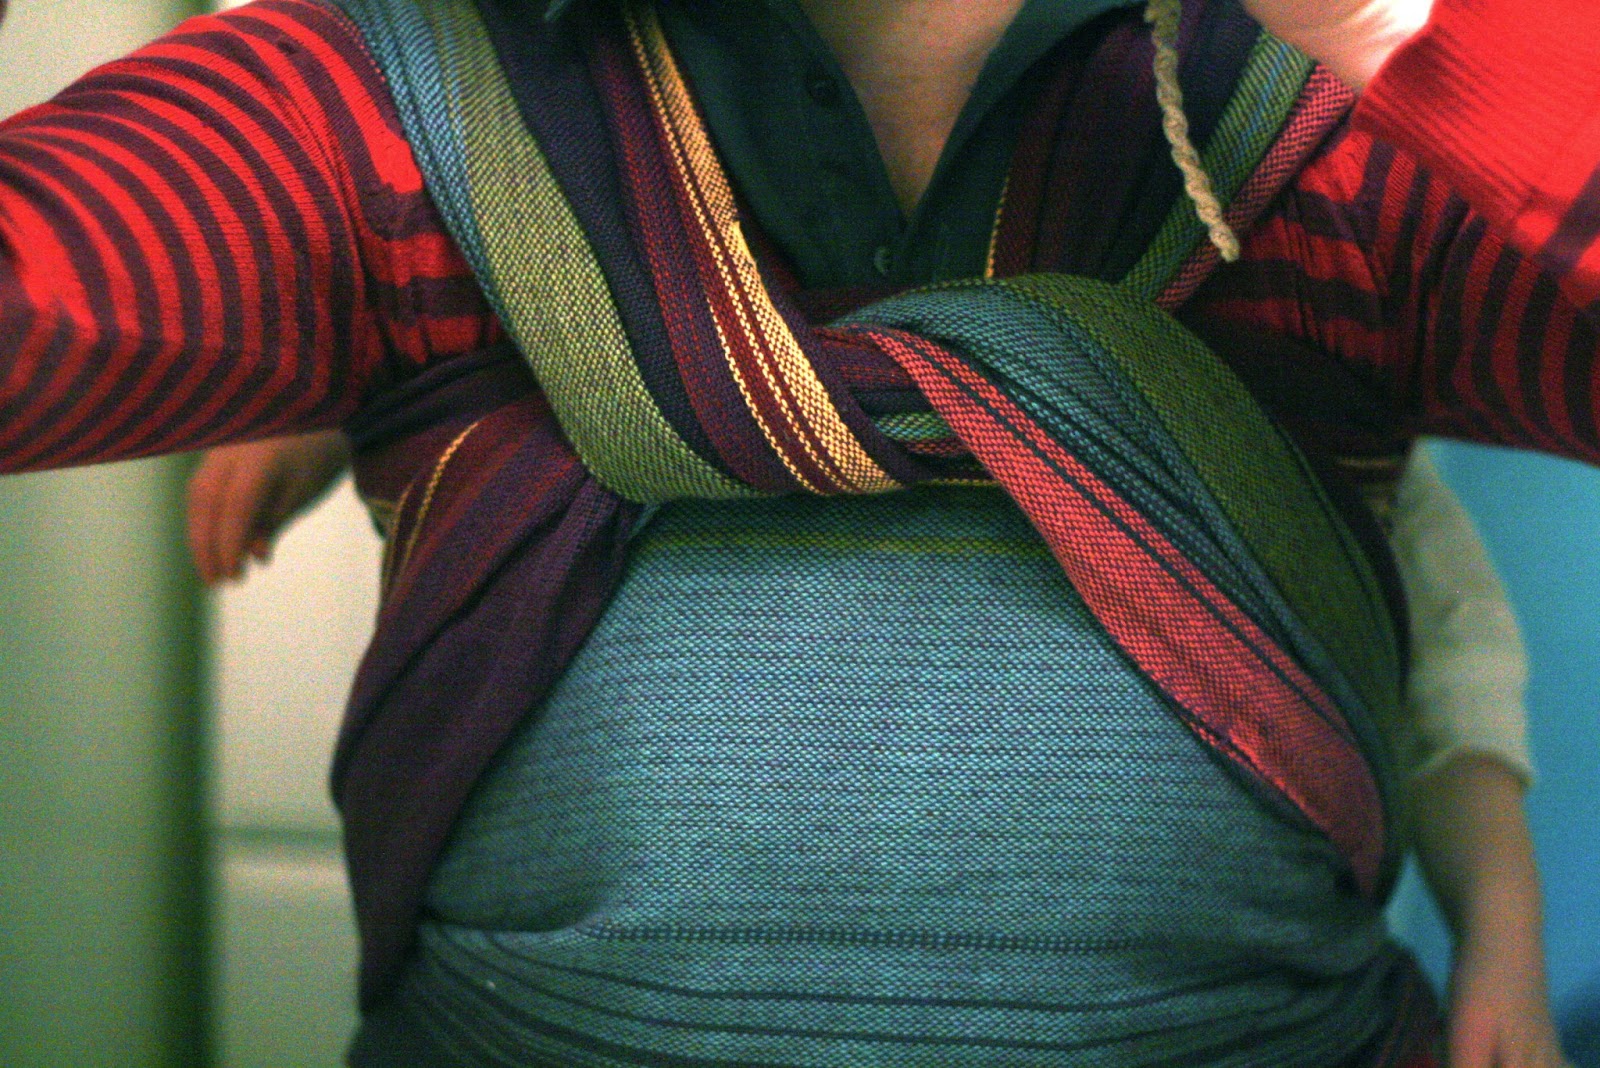
As for wrapping, I have LOVED wrapping with this custom. I primarily wrap with shorter wraps, but it was easy to make an exception for this one. It is light in hand but I would not call it a thin wrap, I would call it an airy weave. When wrapping it does have some grip, so it doesn't glide into passes, but it isn't an arduous task either. But that grip is incredible once wrapped, there is no need to double knot when you tie off, the wrap stays put. Once wrapped it is utterly weightless, truly amazing.


I thought I would give it a really tough final exam, today was the 10km run/walk in our city, and this wrap was going to make a showing. I wrapped my 22 lbs son up in a Double Hammock and set off to walk (I don't run) the 10km with my family and friend. The walk took just over 2 hours, with a short dance party to one of the bands on the side lines, while my mom went to the washroom. Dance party and all, I had to do no adjusting, no retying, not even knot tightening. While the people on the side lines cheered us on my son jumped and jumped and jumped, something that would have popped even the best seat. At the end of the race, not one thing hurt on my body except for my feet, because I have no suitable shoes. My shoulders would have felt the same even if I had no baby on my back, I have never felt this kind of comfort in a wrap after wearing it for so long. 


Apparently we were both offended by something in this photo

5km in not feeling a thing
The only issue I have with this wrap, is that I don't have the funds to afford it. It is totally worth the investment.

Rhianna's Review:
I used this wrap for a couple of short trips and one long stroll and nap (3ish hours). I won't lie, I was hoping to hate it. Here's what I told myself, the price is high, the rails appear lacking (Jamie has touched on this sufficiently), it feels a bit textured or grippy for my taste - this is going to be the worst.
Sad news for a person on the wrap buying wagon - it is THE best. I can't compare to the famed uppy as I've always been to chicken to try one. But I have tried lots of wraps and this is amazing.


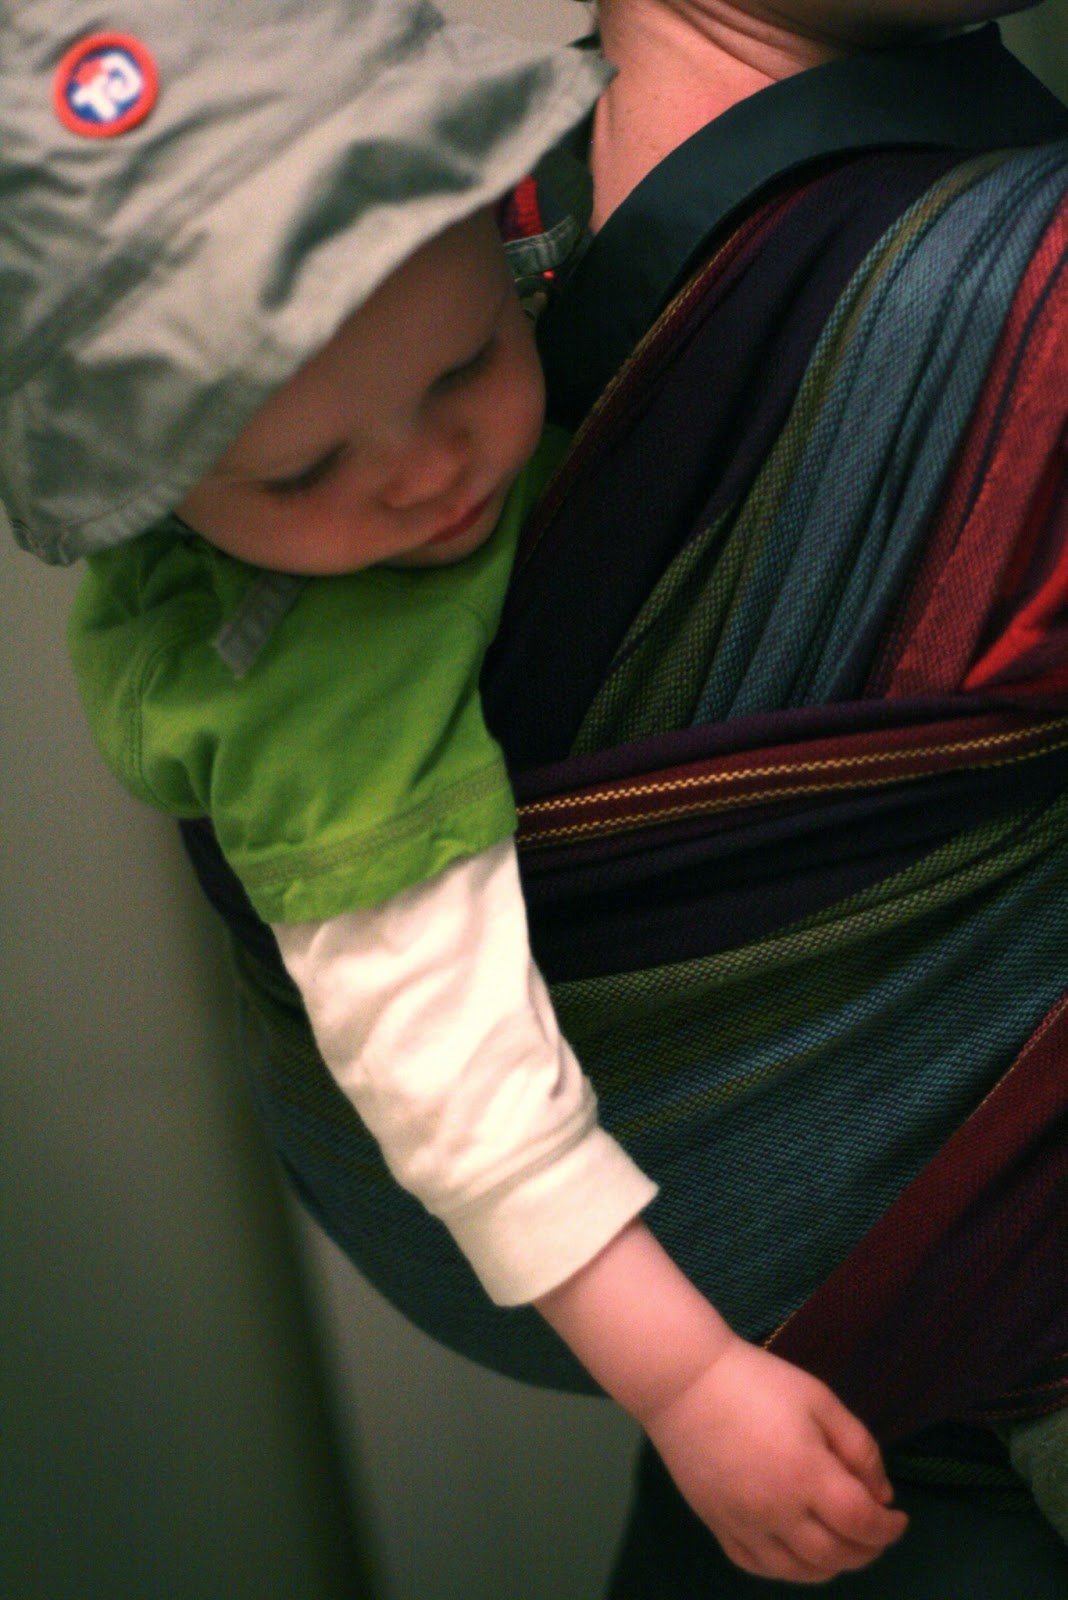
The wrap is thinner in hand, but sturdy and dense. Its soft and easy to tighten. I'm a comparatively lazy wrapper and this wrap was so easy to manipulate I actually followed through with getting all of the slack out. The wrap glides smoothly over itself but has enough texture that a double knot is really unnecessary (though for safety reasons I'll let you decide that yourself). After a walk/nap I came home with my son wrapped and still sleeping, I untied my knot, and undid the cross passes in FWCC and the wrap didn't move a mm for the rest of his nap. It really just stays put.

After being untied for an entire nap
The wrap is beautiful, easy to use and really comfortable. Essentially, I wish I never tried it. Because it has two downfalls; that I'd have to sell a few wraps to afford it and that even if I could afford it I wouldn't be able to buy one anytime soon.


Thursday 25 April 2013

Estrangement and Realization

Wow a whole week since a post, I thought it was 2 days. This has been a crazy fast week, we also have an amazing friend visiting and I want to spend all my time with her.

But in my wrap life I have had some lows and some super high highs! I have been trying to come to grips with my new policy on one in one out. Especially when you have committed yourself to selling something and it doesn't sell.

I decided to sell my Oscha Strato Aequus size 2, I wasn't using it and it felt like the natural choice. I was in need of selling because I had my sights set high for my next purchase. So I listed it and it sat there, the trouble with listing a wooly in the summer. So the plan of attack was to use it a lot and well crap I fell in love again. It is such a great wrap! So for now it stays, even though there is one interested Mum. 
Photo by Kristy Westendorp Photography

After this I was feeling a little down about not being able to sell it, but I refocussed on what I really wanted in my collection. It came down to only having wraps I love, or buying wraps I think I would love. So there was only one option I had, because I love all my wraps, but still want to snag some amazing things. I decided I would sell nothing unless I actually buy one of the amazing things on my list. So there they sat my lovely wraps, not one leaving and they were getting lots of love. 

Top: India (silk) 2, Strato Aequus 2, Braid Pine 4, NLI 4, Orient 3, SNV 4/5, Solsbury 4, Indio Karibik 2, Lila 5
on loan: Leo B&W 5

My in search of list is very small, I have most things I ever desperately wanted. There are definitely beautiful things out there, but nothing that stops me in my tracks. That is except the elusive Uppymama, really a pipe dream that I don't invest too much sorrow in and the new kids on the block, Pavo Textiles, specifically Etini or whatever the seafoam one is in the teaser photo. And then what I think was true wrap love, Two Birds from Artipoppe (and ANYTHING from Artipoppe).

Three wraps, that isn't a lot, and fortunately they were almost impossible... until yesterday. When I happened to be in the right place at the right time, with the right windows open (and conveniently signed in to Etsy). Artipoppe released Argus Revo and I was able to snag a 2. I am living on a high. The Revo I snagged was 1 of 10 out there, so it only happened by sheer luck.

Artipoppe's Revo that will come live with me
https://www.facebook.com/Artipoppe?fref=ts
So now I have to adhere to my one in one out policy and I have listed my Tussah Silk India 2. Which will be tough to let go of, but having this replace it softens the blow.

Also there will be a review posted on Sunday of something SUPER SPECIAL and then a brief hiatus for a family vacation, final editions to "Getting your Baby on you Back".

Thursday 18 April 2013

Series: Getting Baby on Your Back Part 2

This is the second edition of getting you baby on your back, so there will be some repeated information here for those who have read both. Today I will be showing you the "hip scoot" method.

A safety note for back carries:
If you are new to wrapping or back wrapping, it is best to attempt this with a doll first, so you can get the feel for it. Then when you are ready to go for it with your baby, please attempt over a soft surface, preferably with a partner. 

Back wrapping, or really wrapping in general works the best when you are calm, because your baby picks up on your anxiety and tends to squirm or cry. So practicing will really be an asset in your back wrapping adventures. Read through this and watch a couple videos before you attempt.

To Hip Scoot:

*all tutorials in this series are assuming that you are doing a simple carry like Ruck, where your middle marker is placed in the center of the wrap. But the method is the same no matter what carry you do.
I use left and right respectively in this post and put them in brackets, because this could be done on the opposite side as well. 


To start you hold your baby on your hip.


Grab your wrap and find the middle marker.


Place the middle marker on the middle of your baby's back.


Spread the fabric over your baby's body.


Reach behind you and grab the tail (the one that will go on your opposite shoulder)


Find the top rail and pull the slack out. Make sure that it is not twisted.

Bring the tail up and on to your shoulder


Switch hands and support your baby with the opposite hand.


The baby-side arm should now be free.

Not moving your baby, lean forward a bit, lift your free arm up and over your baby. 


Bring the arm on to baby's back and hold under their bum. This should give them full support.


Bring your opposite hand around and grab hold of baby's other leg.


At this point you can easily scoot your baby into the center of your back with your two arms. Then scoot them up your back until they are in a comfortable position.


Now, while holding your baby's bum with opposite hand grab the top rail of your wrap and bring it up and on to your shoulder. 


Then find the top rail (closest to your neck) and snug it TIGHT with both hands. Doing this keeps your baby on your back, as long as you have this tension your baby should stay put.


At this point there are a few different things to do: Always keeping the tension, twist the wrap rails together (left and right side), and hold it in your teeth. Or what I do is, I fold one side on top of the other and pin it to my chest with my chin.

So you can use this method with any back carry, your next step is to make a "seat" for your baby, but that will be another tutorial.

Thursday 11 April 2013

Series: Getting Baby on Your Back Part 1

So, I am going to do some photo tutorials on how to get your baby on your back, but because there are a few different ways, I am splitting them up over a few days.

Today I will be showing how to "Santa Toss" your baby on to your back. This method is best for smaller babies.

A safety note for back carries:
If you are new to wrapping or back wrapping, it is best to attempt this with a doll first, so you can get the feel for it. Then when you are ready to go for it with your baby, please attempt over a soft surface, preferably with a partner. 

Back wrapping, or really wrapping in general works the best when you are calm, because your baby picks up on your anxiety and tends to squirm or cry. So practicing will really be an asset in your back wrapping adventures. Read through this and watch a couple videos before you attempt.

To Santa Toss:
*all tutorials in this series are assuming that you are doing a simple carry like Ruck, where your middle marker is placed in the center of the wrap. But the method is the same no matter what carry you do.
I use left and right respectively in this post and put them in brackets, because this could be done on the opposite side as well. 


First find a flat surface and spread your wrap out, placing the middle marker in the center of your surface.
Now place your baby on the wrap with their back on the middle marker. 
 First bring the wrap over both of your baby's shoulders.
Bring the wrap to the center on both sides and hold them together.


Next pull taught the bottom of the wrap, and bring it up and through their legs. Place this in the same hand as holds the other parts of the wrap.
 You should have now created a little bag. At this point you should be able to pick your baby up securely. (like a little hammock, or one of those bags on the end of a stick that cartoon Hobos carry)
Now here is the trickier part: note this baby is too big for this and I am not strong enough. Worst combination.
But here it goes, while holding your gathered up wrap bundle, lift your baby up, supporting their back.
Then you lift up and slowly bring your baby up and over your shoulder. With a smaller baby you will be able to support more of their back.

 Lift your baby up onto your shoulder, (your baby will be in contact with your body at all times)
Prop your baby on to the top of your shoulder. You will be able to lower you baby into position. (if I were to do this again I would switch which hand I was holding the wrap "bag" with, that way my arm would be able to reach further on his back/bum at this point. But I only got one chance for this one) 
Now that I have switched hands it makes more sense. But if you started with your hand in the wrong sides like I did, I kept my hand on Elias' back, then transfered hands on his back)
Then I pulled the wrap tail that I want hanging over my (right) shoulder up and on to my shoulder.
If the wrap tail for the (left) shoulder is hanging down between you, reach behind your back and pull it up and over your (left) shoulder. Do this while supporting your baby's bum with your other hand.
If when you get your baby on your back, you find your wrap is like mine below (all on once side). Grab the tail closest to your neck (make sure they aren't twisted) and bring it up and over your head on to your left shoulder. Do this while supporting your baby's bum with your other hand.
Now that your wrap tails are on both shoulders, make sure they aren't twisted. Do this while supporting your baby's bum with your other hand.
Then find the top rail (closest to your neck) and snug it TIGHT with both hands. Doing this keeps your baby on your back, as long as you have this tension your baby should stay put.
At this point there are a few different things to do: Always keeping the tension, twist the wrap rails together (left and right side), and hold it in your teeth. Or what I do is, I fold one side on top of the other and pin it to my chest with my chin.

So you can use this method with any back carry, your next step is to make a "seat" for your baby, but that will be another tutorial.