
The slip knot is an awesome skill to learn if you are
going to get into wrapping. There are many carries that use this form of knot, so
you can tighten your wrap once tied off. You can add a slip knot to pretty much
any carry to add some adjustability.
Please note I am using two wraps here so you can really tell which pass is
which.
To Start:
One tail is coming over your shoulder and the other is coming under your
opposite arm. (Note: this is called a rebozo pass, any pass going over one arm
and under the other. You may see this in your explorations and wonder what a
rebozo pass is.)

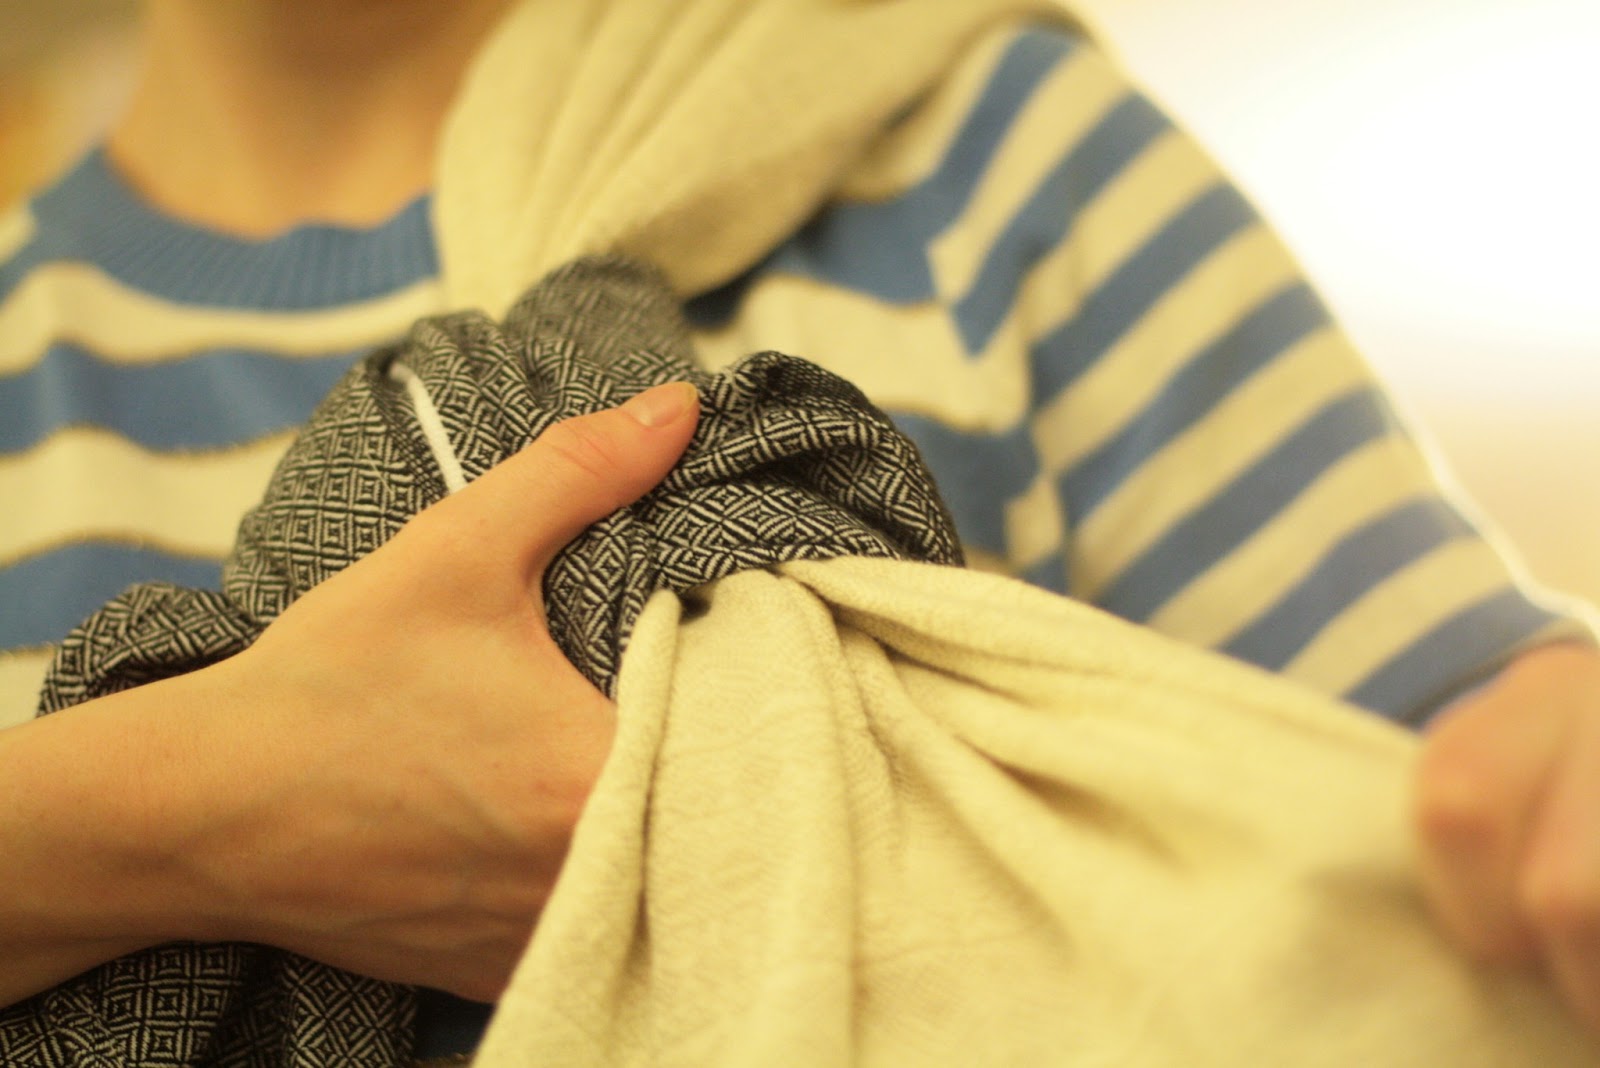
First you cross the tail coming under your arm over
the one hanging over your shoulder.

Then you bring that tail behind and up through, coming through the top hole you’ve made, closest to your collar bone

Then drop the tail straight down. It should be
overlapping the original pass now.

Then bring the tail under the tail over your shoulder.

You should now have created a loop.

Take the remaining tail and pass it through the loop.


Gently tighten, you don’t want to fully tighten yet as
it makes adjusting more difficult.
Then tighten as needed for your carry, by holding the
knot with one hand and pulling strand by strand.

Fully tighten the knot. You will still be able to adjust the tightness at this point.

Here are some carries that use a slip knot:
Rebozo: by Tanya (a localish Mum)
http://www.youtube.com/watch?v=45FnhO23n-E
Coolest Hip Carry: by Babywearing Faith
http://www.youtube.com/watch?v=jy4GWHg3Ebs
Semi-Front Wrap Cross Carry
http://www.youtube.com/watch?v=C1npxEqKj4k
Reinforced Rear Rebozo Ruck with Slip knot: by Catherine Carr
http://www.youtube.com/watch?v=PiUCVJUqpj0
No comments:
Post a Comment